
Prerequisites
- BrightSign Series 6 Player Hardware
- Empty SD-card formatted to FAT
- Internet connection via Ethernet cable
- (Optional) BrightSign Wi-Fi Module
Initial setup
If setting up with a Wi-Fi Module, connect the BrighSign Wi-Fi Module to the device (follow the official BrightSign guide for instructions on installing the Wi-Fi Module).
There are 2 ways to set up and manage the sklera player on a new BrightSign Device:
- Option A: Use BrightAuthor:connected, BrightSign’s devices cloud management tool (recommended).
- Option B: Install the sklera player directly.
Option A: Setting up the sklera player with BrightAuthor:connected (recommended)
1. Sign up at https://app.bsn.cloud. Create a new Network.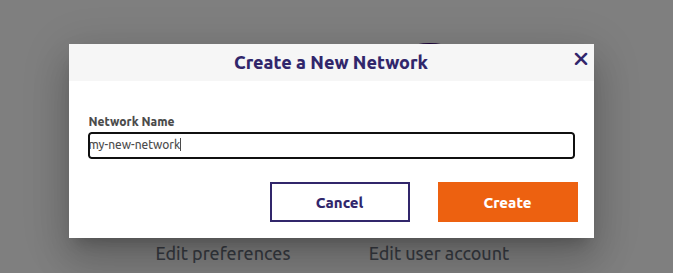
2. Click "Setup" to create a new Setup.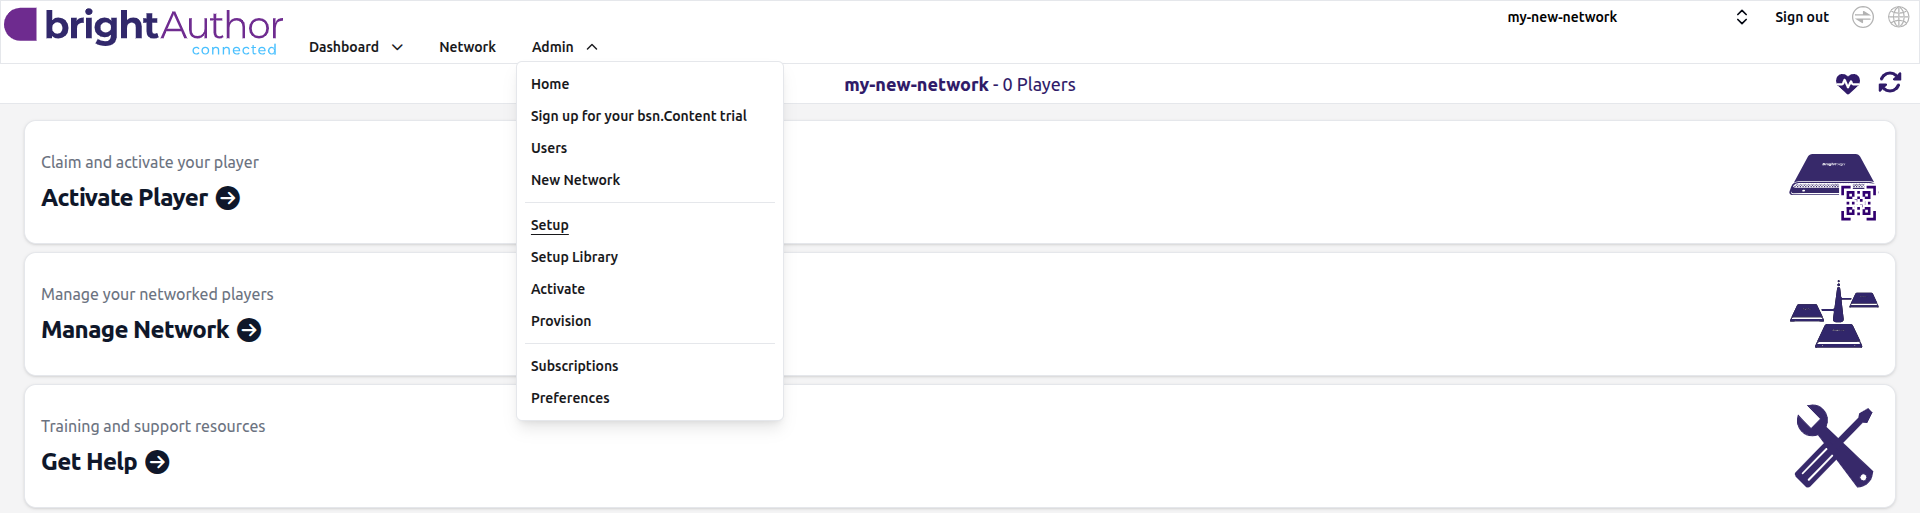
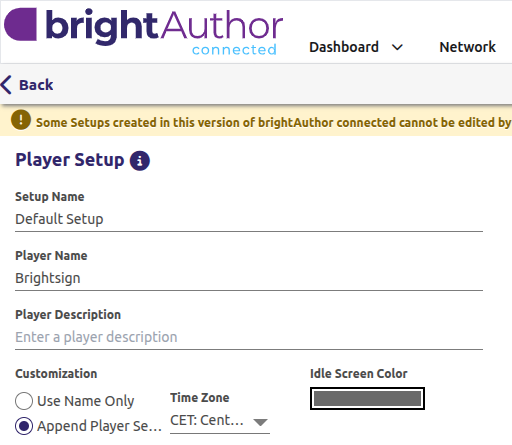
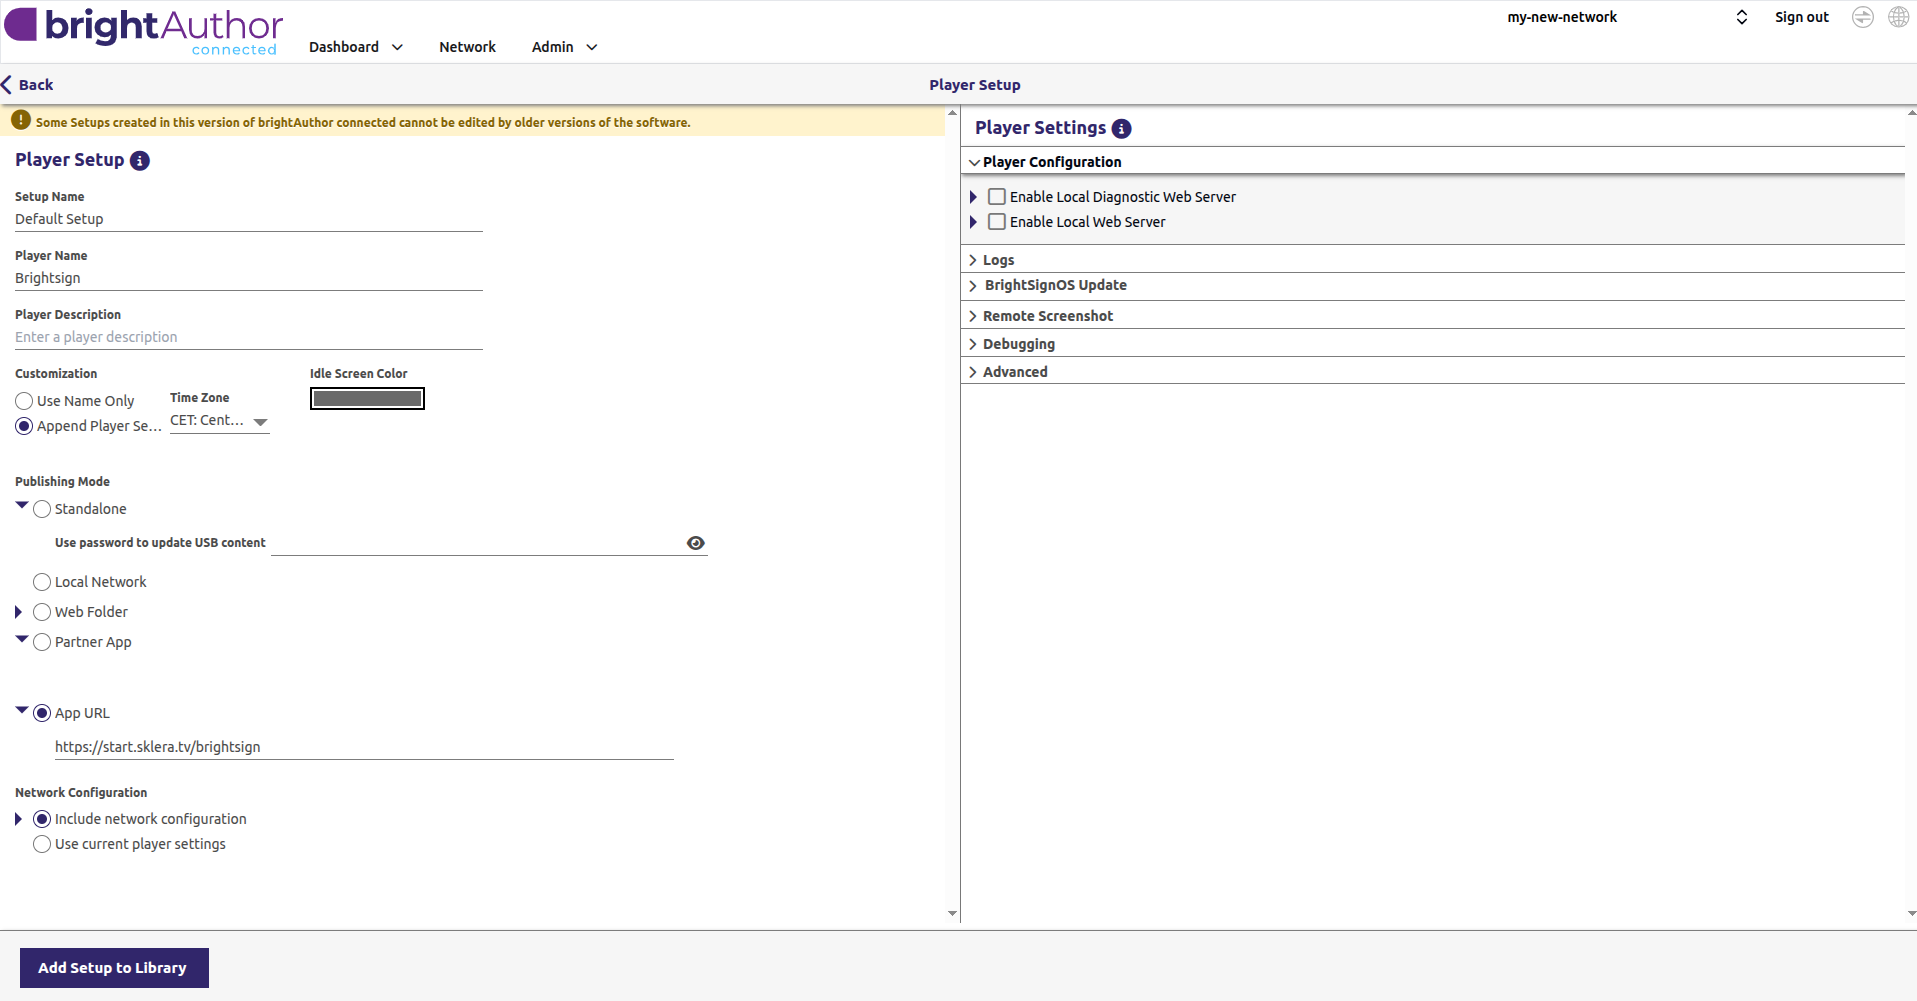
3. Create a new Setup.
Setup Name
"Default Setup". The Setup with this name will be applied to all new players by default.
Any other name can be used. If the name is different from “Default Setup”, the Setup has to be manually applied to the player in the "Provisioning" page. In some cases devices may need to also be reprovisioned.
Player Name
Enter any name for the player(s) that will use this setup.
Customization
Apply a time uone if needed.
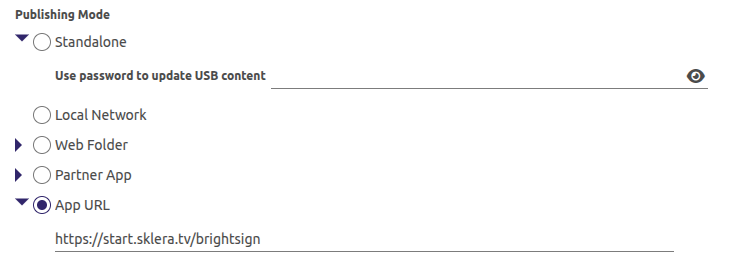
Publishing Mode
Select “App URL” and enter the URL: https://start.sklera.tv/brightsign.
When using a custom player server (On-Premise or Private Cloud), you must replace the URL with the endpoint of your player server, e.g. https://PLAYER_SERVER_URL/brightsign.
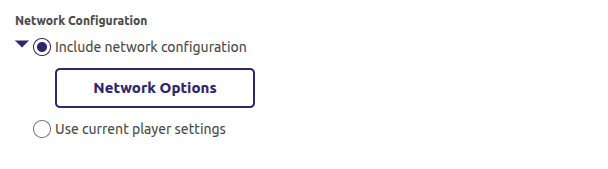
Network Configuration
"Include network configuration".
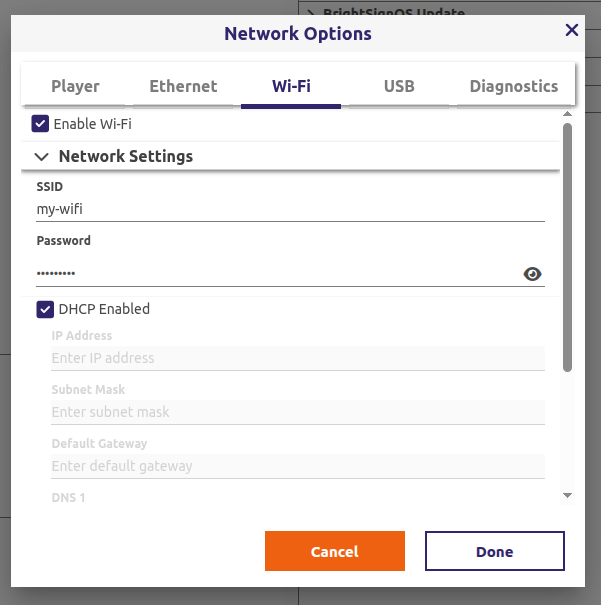
If a Wi-Fi Module is present, open "Network Options" enable Wi-Fi and enter Wi-Fi SSID and password.
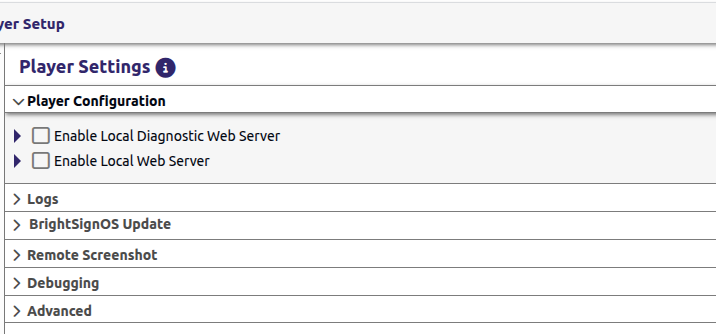
Disable Local Diagnostic Web Server (Recommended)
Under Player Settings > Player Configuration.
4. Add the Setup to the Library by clicking the "Add Setup to Library" button.
5. Insert an empty FAT-formatted SD-card in the BrightSign device. Connect Ethernet and HDMI cables. Power on the device. A Pairing code will appear.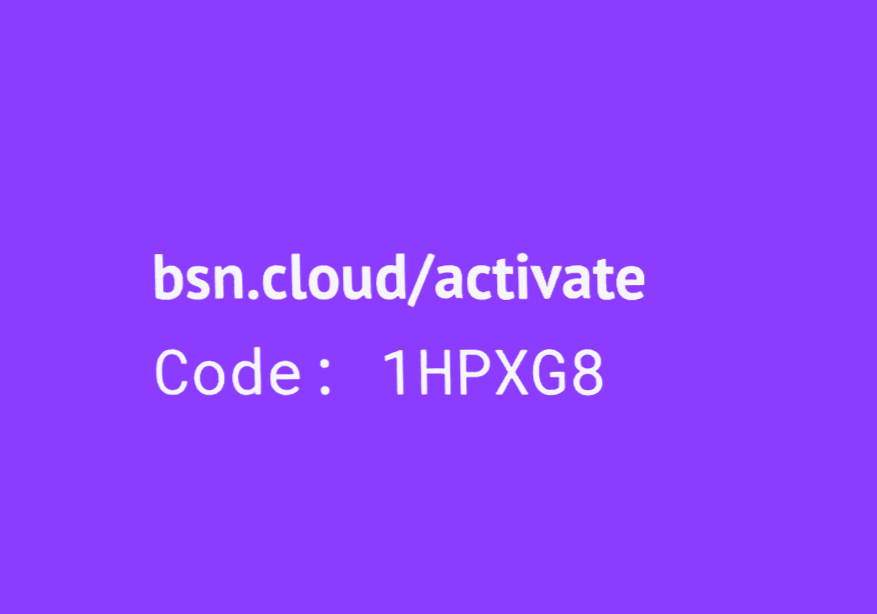
6. In BrightAuthor:connected click “Activate” and enter the pairing code.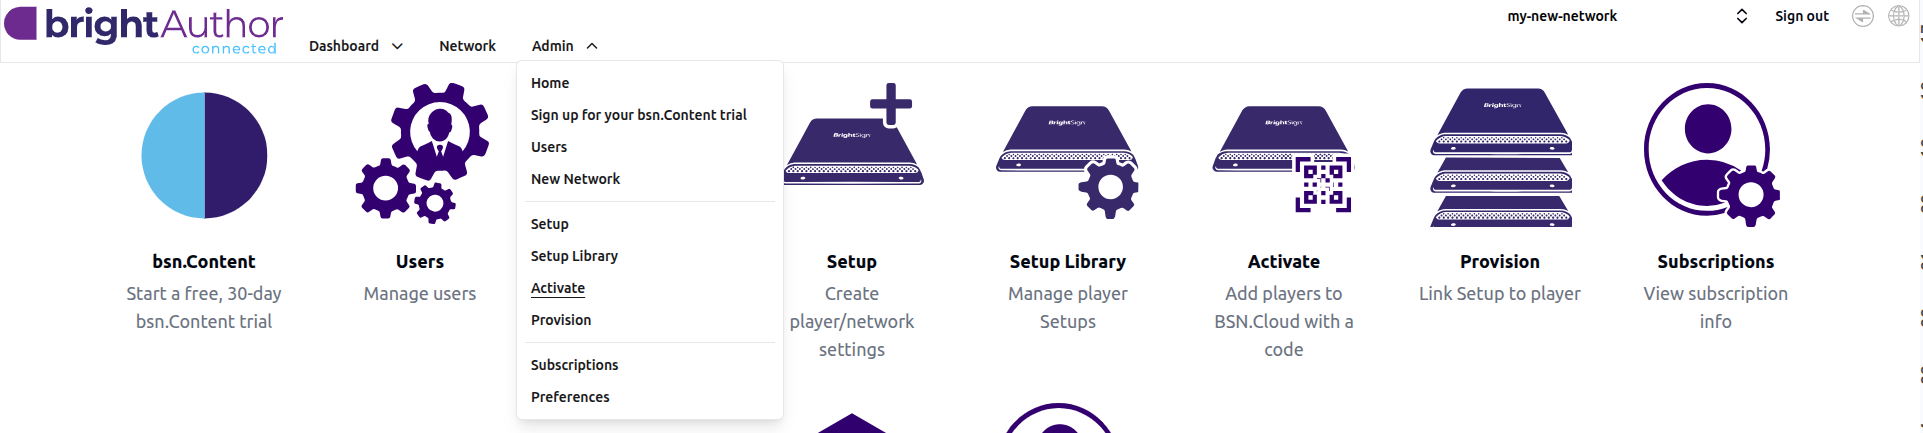
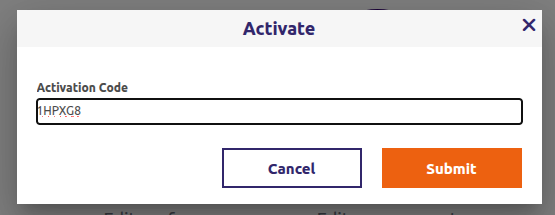
The device will pair and start downloading the files.
During this process the device will reboot several times. Do not power off the device until the setup is complete.
7. Once the setup ist complete, the sklera player pairing screen will appear. Follow the instructions in the app to set up your channel.
Option B: Install the sklera player directly.
1. Download the zip package from https://start.sklera.tv/brightsign. Don’t change the name of the package. It must be named exactly "autorun.zip".
When using a custom player server (On-Premise or Private Cloud), you must replace the URL with the endpoint of your player server, e.g. https://PLAYER_SERVER_URL/brightsign.
2. Put the zip-package at the root of the FAT-formatted SD-card. Connect Ethernet and HDMI cables. Power-up the device.
3. The sklera player will be installed on your device. During this process the device will reboot several times. Do not power off the device until its set.
4. Once the setup is complete, sklera player pairing screen will appear. Follow the instructions in the app to set up your channel.
Control the device via BrightAuthor:connected.
This option is available only if the device is set up via BrightAuthor:connected.
1. In BrightAuthor:connected click on "Network"
2. Click on the gear icon (to the left of the Serial Number).
3. In the following page you can remotely control your device, read extended device info, manage files on SD-card, etc.
Enable high resolution output (4k resolution on supported displays and BrightSign Hardware).
1. In the sklera CMS click “Edit Screen” and go to the tab "Settings".
2. Enable “High resolution output” in the “Device-specific Settings” section.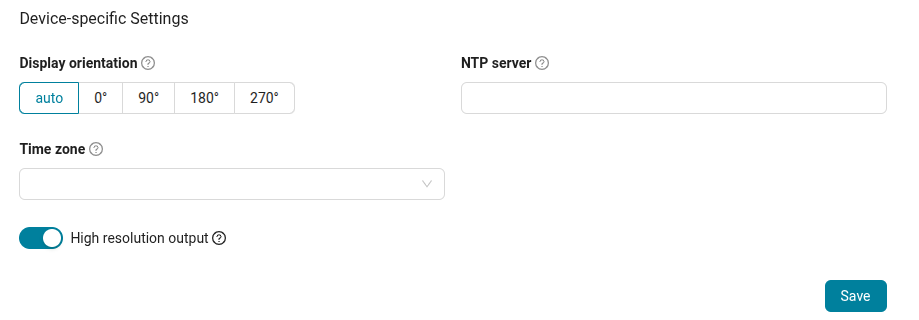
Set Wi-Fi SSID and password if no ethernet connection is available.
You can configure Wi-Fi settings if an ethernet cable is not available.
1. Download the autorun.zip file from https://start.sklera.tv/brightsign.
When using a custom player server (On-Premise or Private Cloud), you must replace the URL with the endpoint of your player server, e.g. https://PLAYER_SERVER_URL/brightsign.
2. Unzip it and copy custom.template.brs to custom.brs.
3. Replace the contents of the custom.brs file with the following snippet. Update WIFI_SSID and WIFI_PASSWORD with the actual SSID and password.
Sub Main()
  WIFI_SSID = "your-wifi-network-name"
  WIFI_PASSWORD = "your-wifi-network-password"
  nc = CreateObject("roNetworkConfiguration", 1)
  if nc <> invalid then
    nc.SetWiFiESSID(WIFI_SSID)
    nc.SetWiFiPassphrase(WIFI_PASSWORD)
    nc.SetDHCP()
    nc.Apply()
  end if
End Sub
4. Zip the package. All files must exist on the root of the zip-archive. The package must have the name autorun.zip.
5. Put the autorun.zip file to the root of the empty SD-card. Insert it into the device. Restart the device.
6. The device will connect to the Wi-Fi network.
* You can add any custom code that has to be executed before the device starts. The code must be written in BrightScript. Refer to the official BrightSign Documentation for further guidance.